_edited.jpg)
"Photo"synthesize This!
- Feb 2, 2023
- 3 min read
Updated: Feb 15, 2023

I've been wanting a living plant wall for a while now. I think they're beautiful and add a much needed nature vibe. But when you don't want to spend money, and not feeling overly crafty, it can seem like a lost cause. So, I did what I always do... improvise with what I already have.
My improvisation starts with a trip to Longwood Gardens in Pennsylvania a few months ago. I absolutely fell in love with the conservatory, so I took a ton of pictures! We also stayed in this Air BnB with a very moody, eclectic decor - a lot of dark colors with greenery sprinkled in. I was super inspired, so I took pictures from there too!


Well, when we got home to brown and dry Arizona, I was very disappointed with my tan, boring walls. Inspiration struck and I decided to pull from what I learned at the rental and frame some of those garden prints! They needed to be where I could see them everyday and feel inspired... in my bathroom! I see them everyday while I'm showering and it takes me right back to that trip and all of the wonderful things I saw and experienced.

Now, we recently moved the furniture all around in the great room and den so that necessitated new decorating. Well, one wall that wasn't exposed before looked lifeless now. I started thinking a living plant wall would be perfect! But, wow either a lot of work or expensive - neither of which I was willing to do so I had to get creative. My Longwood Gardens wall turned out to be the inspiration for my "Photo"synthesized Plant Wall (see what I did there? :)
I had just started going through the garage to minimize what we take on the next move (another project I have going right now). So I'm going through a box of potential donations and find a bunch of small, black Ikea frames! So, this gets me thinking. For this project, I wanted all green, and it to look like an actual hanging plant - long in the middle, shorter on the sides. I arranged the frames on the dining room table to get the layout, then found the photos from the Gardens to manipulate. I took three pictures and cropped and enhanced them to get the most leaf exposure.
I just replaced the toner in my printer but I didn't want to put it all on these prints, so I went to Walgreens.com/photo and started pricing how much these prints would cost. The 8 larger prints were going to be $2.99/each and the smaller 12 were only $0.38/each, so I decided to print the larger at home and pay for the smaller to be printed at Walgreens to be ready in an hour.


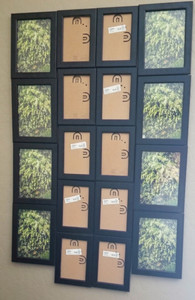


While I waited for my prints, I began hanging the frames. I did not want to measure out where each nail would have to go, so I made it easy on myself? I just removed the plastic(glass) from the frame so I could get to the hangers from the front, then I hung the first one by putting the nail in the hanger and hammering it in place. I hung the next one right next to it using a level to make sure they were straight, then just started hanging all of the others from these two. Viola! This was the easiest part.
I couldn't wait to see how it would look, so I put in the home prints and hung them to get a feel. By this time, Walgreens notified me so I picked those up and started assembling the rest. I had to take all of the frames down to start over with hanging them from the bottom (the upper frames got in the way of the lower frames when trying to hang them, so starting from the bottom was absolutely necessary). I'm really happy with how it turned out and it only cost $5 for the whole project! Big bang for a small buck.


Comments